To change your DNS settings from your GoDaddy account, follow these steps:
1, Log in to your GoDaddy account at http://www.godaddy.com.
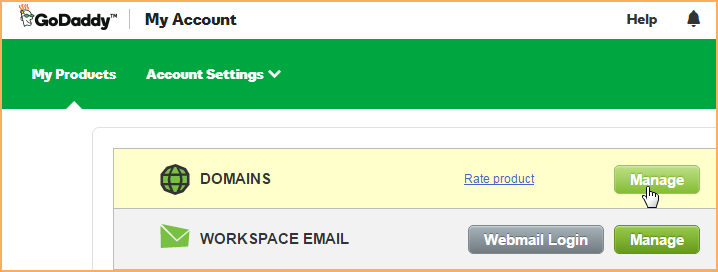
2. From your account page, click the Manage button within the Domains section.
3. For the domain that you are using for your Driven 2 Services site, click the Settings drop-down and select the Manage DNS option.

4. Within the row where Type = A and Name = @, click the pencil icon to enter edit mode.
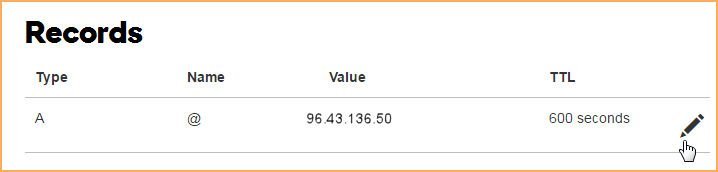
5. Enter 96.43.136.50 in the Points to field, then click Save.
6. Within the row where Type = CNAME and Name = www, click the pencil icon.
7. If you are using Godaddy for your email, no further changes are needed and you can save.
8. If you plan to use our server for email, GoDaddy has instructions here: https://www.godaddy.com/help/add-an-mx-record-19234 - Use hosting.driven2services.com as the MX name, and any MX level since you'll only use one MX address.
1, Log in to your GoDaddy account at http://www.godaddy.com.
2. From your account page, click the Manage button within the Domains section.
3. For the domain that you are using for your Driven 2 Services site, click the Settings drop-down and select the Manage DNS option.
4. Within the row where Type = A and Name = @, click the pencil icon to enter edit mode.
5. Enter 96.43.136.50 in the Points to field, then click Save.
6. Within the row where Type = CNAME and Name = www, click the pencil icon.
7. If you are using Godaddy for your email, no further changes are needed and you can save.
8. If you plan to use our server for email, GoDaddy has instructions here: https://www.godaddy.com/help/add-an-mx-record-19234 - Use hosting.driven2services.com as the MX name, and any MX level since you'll only use one MX address.